
My cheesecake obsession continues. This is my 4th variation of my greek yogurt cheesecake protein bar concoctions. The first was the Cheesecake Protein Bars, second was the Key Lime Cheesecake Protein Bars, third was the Peanut Butter Chocolate Cheesecake Protein Bars, and fifth (and probably not final) are these Coconut Cheesecake Protein Bars. I love anything and everything coconut, so these simply had to happen.

What gives these the coconut flavor is mostly in the base. I added coconut oil for the fat, and unsweetened (medium fine) coconut. In the filling, I used coconut extract, but in all honesty, I don’t think it gave it much more of a coconut flavor. You definitely get the punch of coconut flavor from the base. Its not overpowering, its just enough, so I love it. So I wouldn’t run around to different grocery stores trying to find coconut extract. It will taste just as amazing without it.

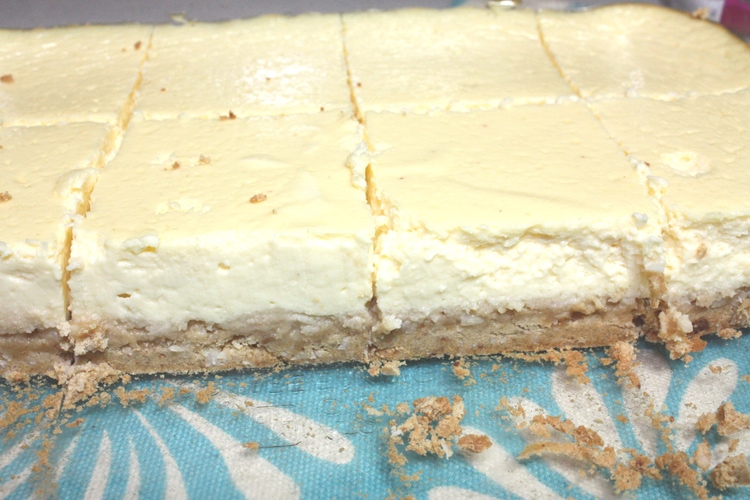
I added a bit of roasted coconut chips (FYI, not the same as coconut flakes) on top to make it look a bit prettier, but they are strictly a garnish. Just because I always have roasted coconut chips around. These ones are from Trader Joe’s, but I also love these other ones found in Canada, the brand is Rockwell‘s. Those ones are a darker brown as they are more toasted, and I just love grabbing handfuls out of the bag daily. (I’m not joking!)
I wanted to mention a quick note about the sweetener you use in the cheesecake. Use a sweetener that you know you already like. If you aren’t a fan of stevia, but want non-sugar, use xylitol or even monk fruit or erythritol. If extra sugar calories aren’t a big deal to you, use honey or agave or cane sugar. Just know that you want to like the sweetener by itself, before putting it in the cheesecake. I know some aren’t fans of stevia, and personally I don’t find there is any bitterness, but that may be because I’ve been using it for so many years and have just become accustomed to it. Also, some stevia’s are not good tasting. My preferred brands are NuNaturals, Krisda (in Canada), and Truvia. You can make this cheesecake to your sweetness level. Taste a bit as you go. I find when using a non-sugar sweetener, you need to have it on the fairly sweet side, as it tends to lose a bit of sweetness when baked. Not sure why, but its just a tip.

Now, I sit here thinking what could be the next variation….hmmm. I’m sure it will be soon, so keep an eye out for it! 😉
- 2 eggs
- 2 cups non-fat greek yogurt
- ½ cup stevia for baking or 15 packets (or whatever sweetener you like honey, agave, cane sugar, just test for sweetness level. Nutrition will change based on sweetener used)
- 1 Tbsp gluten free flour (I use whatever gluten free all purpose mix. If not gluten free, use regular all purpose flour)
- 2 tsp coconut extract *optional (I didn't find the coconut extract to add a lot of extra coconut flavor, so if you don't have it, you could totally omit)
- ¾ cup graham cracker crumbs (for gluten-free I used 7 S'morables Gluten Free Crackers)
- 3 Tbsp unsweetened coconut
- ½ cup whey protein, vanilla (I used MRM vanilla)
- 4 Tbsp coconut oil, melted
- 30 drops stevia (optional) (I used NuNaturals)
- Preheat your oven to 300 degrees F.
- In a medium bowl, whisk the eggs, add in the greek yogurt and coconut extract (if using) and whisk until smooth. Next, add in the stevia and flour a little at a time, whisking after each addition.
- Once the cheesecake filling is whisked until smooth, set aside
- Next, start the base. Mist or lightly oil an 8x8 pan.
- In a bowl, mix together the graham cracker crumbs, coconut, whey protein and liquid stevia (if using).
- Once the dry ingredients are combined, drizzle in the melted coconut oil and stir until its all combined.
- Press the graham crumb mixture evenly into the bottom of the 8x8 square pan. Ensure you pack it down firmly.
- Then pour over the cheesecake filling and spread it around so its even.
- Place in the oven and bake for approx. 45-47 minutes
- When its done, it will just start to go golden around the edges, and it will jiggle slightly in the middle shake it side to side slightly.
- If it still seems too liquidy in the middle, bake for a few minutes longer.
- Allow to cool completely, then put into the fridge and allow to chill completely.
- Will take 2-3 hours to completely chill in the fridge.
- Keep stored in the fridge with tin foil over top of the pan.